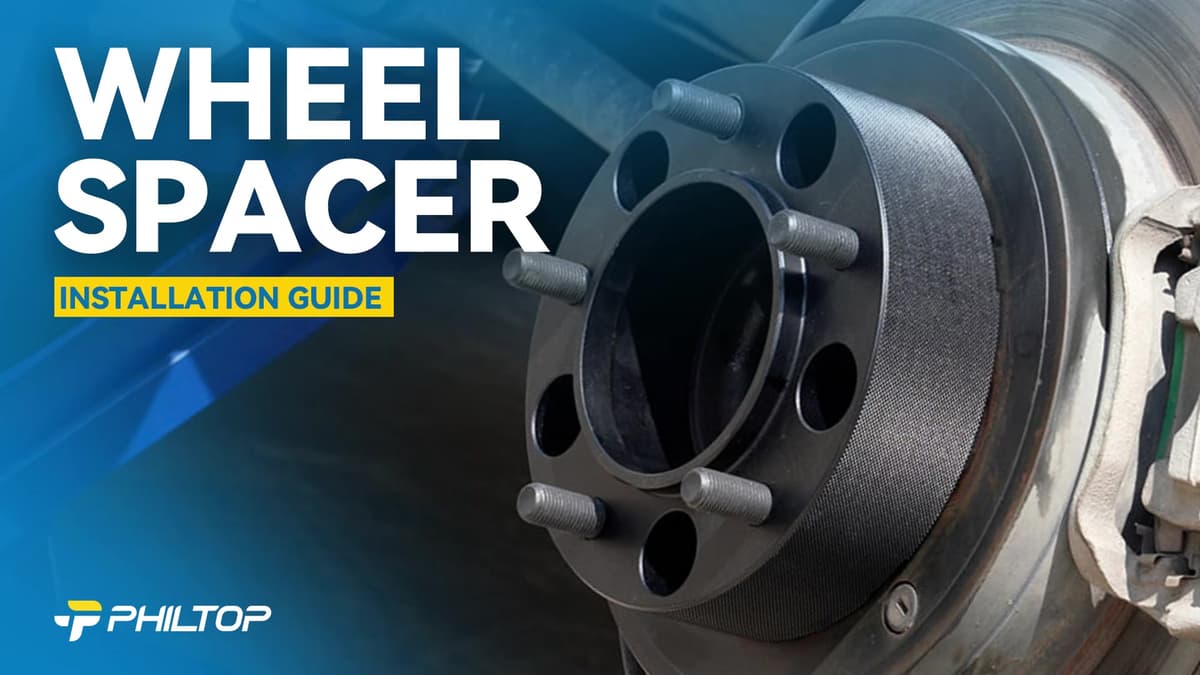
[Wheel Spacers Specification] --- Bolt Pattern: 6x135mm ; | Thickness: 1.25 inch ; | Thread Pitch: M14x2 ; | Hub Bore: 87mm ; | Recommended torque: 85-90 ft/lbs. !!! Note: If the length of the vehicle bolts exceed the thickness of the wheel adapters, you need to cut the vehicle bolts
[Vehicle Application] --- The 6x135mm Wheel Spacer set replacement for 2010-2014 F-15-0; 2004-2008 F-15-0; 2005-2014 Expedition; 2003-2011 Navigator; 2003 Expedition; 2006 Mark LT; 2013-2014 Navigator; 2008 Mark LT
[High Quality] ---6x135mm Wheel Spacer is truly forged from lightweight anodized 6061-T6 aircraft-grade aluminum alloy, the surface anodized coating can protect the metal surface from environmental erosion under extreme conditions. CNC precisely machined, with pre-installed heat treated 10.9 grade carbon steel studs, 7-10 times the corrosion resistance of similar products. The installation fit more better, so as to prevent wheel vibration and maintain the stock driving
[Aggressive Driving Experience] --- These 6x135mm Wheel Spacers can move your wheels further out from the wheel hub, allow for larger tire installation to the vehicle. Installing the wheel spacers can fix brake caliper clearance issues, correct tire friction issues, increase cornering stability, give your vehicle a more aggressive stance
[Professional Services] --- Before placing an order, confirm compatibility by entering the year, make, and model in the PhiltopAuto suitability filter in the upper left corner. --- IMPORTANT SAFETY ADVISORY --- : Torque lug bolts/nuts to manufacturer specifications. Check and re-torque all hardware after 25-50 miles. See Product Description for additional install information
Measure and confirm the bolt pattern, center bore, thread size and spacer thickness before purchasing.
Check the stock stud length. Extended studs may be required if the original studs are too short.
Confirm adequate wheel-to-fender clearance.
Test-fit the spacer. It must sit completely flush against the hub or brake rotor with no gap.
Installation Steps
Step-1: Clean the Mounting Surfaces:Remove all rust, dirt, oil and grease from the hub, studs and mounting surfaces.
Step-2: Install the Inner Plate:Position the inner plate flush against the hub. Install the open-end lug nuts with the tapered ends facing the spacer.
Step-3: Check Stud Clearance:Make sure the nuts sit flush inside the inner plate. If the stock studs interfere with the adapter or wheel, shorten or replace them as required.
Step-4: Install the Outer Plate:Apply thread locker to the first 5–6 threads of the connecting bolts. Install the outer plate and torque the bolts to 50–55 ft-lb (68–75 N·m).
Step-5: Install the Wheel:Start all lug nuts by hand and tighten them evenly in a crisscross pattern with a torque wrench. Do not use an impact wrench.
After Installation
Confirm that the spacer, adapter and wheel sit completely flush with no gaps or interference.
Check that all fasteners are secure and the wheel rotates freely.
Recheck the adapter nuts and bolts after the first 50–100 miles.
Recheck and retorque every 3,000–5,000 miles.
Product Video
Product Description
Reviews
4.9/5
Based on 29 reviews
5
86%
4
14%
3
0%
2
0%
1
0%
J
Jeremy B
03/05/2025
I purchased the 1.25” spacers so the factory studs stuck out about .25” past the spacer and since I do not have the cut outs on the back of my factory rims so I had to cut off a small portion of each stud. Watched YouTube videos and found that a sawzall with a carbide tipped metal blade worked the best. I used about 3-4 total blades I purchased from Harbour Freight along with the torque wrench to tighten all the lug nuts to 95 ft/lbs. Additionally, I used anti-seize on the back of spacers when installing them so they’re not a pain to get off in the future when you have to do brake work, etc and the red locktite for each factory stud.While I was at Harbor freight I also purchased a wire brush wheel kit and stuck one of those on my drill to clean off all the old dust and surface rust from the hub before installing the spacers.I’ve had them on for a few weeks now with no issues, drives smooth and I’ve been on the highway and pulled my trailer with no problems. Hopefully long term they remain this way.Good luck and hope this helps. Take your time and do it right.
M
Makanesi
01/12/2025
hope it doesn't give my truck problems but I have faith 🙏
FAQS
Definitely. By widening your vehicle’s track, PHILTOP spacers enhance stability and handling. A wider stance reduces body roll, improves tire grip, and helps your car corner more confidently.
Stacking spacers is generally not recommended because it may affect seating and fastener engagement. Select a single spacer of the appropriate specification instead.
Use the torque specified by the vehicle or spacer instructions for the applicable fasteners. Tighten in a star pattern with a calibrated torque wrench.
Add your vehicle to ensure fitment
Make
Model
Trim
Engine
Loading vehicle options...
Choose Year, Make, and Model to check exact fitment.
2003-2014 Ford F-150 3.5L V6 | 6x135mm 87mm Center Bore M14x2 Thread Wheel Hub Accessory - PHILTOP
Durable
6061T6
SKU:
94ISWSA065007US
4.9
$132.55$13255
Check if this fits your vehicle
Select a vehicle to check this product.
Bolt Pattern
6x135mm
Wheel Bolt Pattern
6x135mm
Vehicle Bolt Pattern
6x135mm
Thread Size
M14x2
Center Bore
87
Hub-Centric Lip
Yes
Thickness
1.25inch
Outside Diameter
176
[Wheel Spacers Specification] --- Bolt Pattern: 6x135mm ; | Thickness: 1.25 inch ; | Thread Pitch: M14x2 ; | Hub Bore: 87mm ; | Recommended torque: 85-90 ft/lbs. !!! Note: If the length of the vehicle bolts exceed the thickness of the wheel adapters, you need to cut the vehicle bolts
[Vehicle Application] --- The 6x135mm Wheel Spacer set replacement for 2010-2014 F-15-0; 2004-2008 F-15-0; 2005-2014 Expedition; 2003-2011 Navigator; 2003 Expedition; 2006 Mark LT; 2013-2014 Navigator; 2008 Mark LT
[High Quality] ---6x135mm Wheel Spacer is truly forged from lightweight anodized 6061-T6 aircraft-grade aluminum alloy, the surface anodized coating can protect the metal surface from environmental erosion under extreme conditions. CNC precisely machined, with pre-installed heat treated 10.9 grade carbon steel studs, 7-10 times the corrosion resistance of similar products. The installation fit more better, so as to prevent wheel vibration and maintain the stock driving
[Aggressive Driving Experience] --- These 6x135mm Wheel Spacers can move your wheels further out from the wheel hub, allow for larger tire installation to the vehicle. Installing the wheel spacers can fix brake caliper clearance issues, correct tire friction issues, increase cornering stability, give your vehicle a more aggressive stance
[Professional Services] --- Before placing an order, confirm compatibility by entering the year, make, and model in the PhiltopAuto suitability filter in the upper left corner. --- IMPORTANT SAFETY ADVISORY --- : Torque lug bolts/nuts to manufacturer specifications. Check and re-torque all hardware after 25-50 miles. See Product Description for additional install information
Measure and confirm the bolt pattern, center bore, thread size and spacer thickness before purchasing.
Check the stock stud length. Extended studs may be required if the original studs are too short.
Confirm adequate wheel-to-fender clearance.
Test-fit the spacer. It must sit completely flush against the hub or brake rotor with no gap.
Installation Steps
Step-1: Clean the Mounting Surfaces:Remove all rust, dirt, oil and grease from the hub, studs and mounting surfaces.
Step-2: Install the Inner Plate:Position the inner plate flush against the hub. Install the open-end lug nuts with the tapered ends facing the spacer.
Step-3: Check Stud Clearance:Make sure the nuts sit flush inside the inner plate. If the stock studs interfere with the adapter or wheel, shorten or replace them as required.
Step-4: Install the Outer Plate:Apply thread locker to the first 5–6 threads of the connecting bolts. Install the outer plate and torque the bolts to 50–55 ft-lb (68–75 N·m).
Step-5: Install the Wheel:Start all lug nuts by hand and tighten them evenly in a crisscross pattern with a torque wrench. Do not use an impact wrench.
After Installation
Confirm that the spacer, adapter and wheel sit completely flush with no gaps or interference.
Check that all fasteners are secure and the wheel rotates freely.
Recheck the adapter nuts and bolts after the first 50–100 miles.
Recheck and retorque every 3,000–5,000 miles.
Product Video
Product Description
Reviews
4.9/5
Based on 29 reviews
5
86%
4
14%
3
0%
2
0%
1
0%
J
Jeremy B
Mar 05,2025
I purchased the 1.25” spacers so the factory studs stuck out about .25” past the spacer and since I do not have the cut outs on the back of my factory rims so I had to cut off a small portion of each stud. Watched YouTube videos and found that a sawzall with a carbide tipped metal blade worked the best. I used about 3-4 total blades I purchased from Harbour Freight along with the torque wrench to tighten all the lug nuts to 95 ft/lbs. Additionally, I used anti-seize on the back of spacers when installing them so they’re not a pain to get off in the future when you have to do brake work, etc and the red locktite for each factory stud.While I was at Harbor freight I also purchased a wire brush wheel kit and stuck one of those on my drill to clean off all the old dust and surface rust from the hub before installing the spacers.I’ve had them on for a few weeks now with no issues, drives smooth and I’ve been on the highway and pulled my trailer with no problems. Hopefully long term they remain this way.Good luck and hope this helps. Take your time and do it right.
M
Makanesi
Jan 12,2025
hope it doesn't give my truck problems but I have faith 🙏
FAQS
Definitely. By widening your vehicle’s track, PHILTOP spacers enhance stability and handling. A wider stance reduces body roll, improves tire grip, and helps your car corner more confidently.
Stacking spacers is generally not recommended because it may affect seating and fastener engagement. Select a single spacer of the appropriate specification instead.
Use the torque specified by the vehicle or spacer instructions for the applicable fasteners. Tighten in a star pattern with a calibrated torque wrench.


 Durable