


Kelly_SUV_Life_138

03/23/2026
Got this axle in just a couple of days, which was awesome. Installation was straightforward and it fit perfectly. Couldn't ask for more.

 Front
Built to Last
Check if this fits your vehicle
Select a vehicle to check this product.
Check if this fits your vehicle
| Year | 2014 - 2016 | 2014 - 2016 | 2014 - 2016 | 2014 - 2016 | 2014 - 2016 |
|---|---|---|---|---|---|
| Make | Honda | Honda | Honda | Honda | Honda |
| Model | TRX420FA1 FourTrax Rancher 4x4 Auto DCT | TRX420FA2 FourTrax Rancher 4x4 Auto DCT with EPS | TRX420FE1 FourTrax Rancher 4x4 ES | TRX420FM1 FourTrax Rancher 4x4 | TRX420FM2 FourTrax Rancher 4x4 with EPS |
| Trim | Base | Base | Base | Base | Base |
| Engine | - | - | - | - | - |
| Note | Standard Duty Replacement | Standard Duty Replacement | Standard Duty Replacement | Standard Duty Replacement | Standard Duty Replacement |
 User manual (PDF)


4.3/5
Based on 4 reviews
Kelly_SUV_Life_138
03/23/2026
Got this axle in just a couple of days, which was awesome. Installation was straightforward and it fit perfectly. Couldn't ask for more.
RickFixIt_553
12/10/2025
Really impressed with the build quality on this. It feels super heavy-duty and for the price, it's a steal. Definitely a great value.
Fitment depends on the engine, transmission, and whether your car has ABS. Please enter your vehicle's Brand, Year, and Model into the "Fitment Checker" at the top of the page to confirm a match.
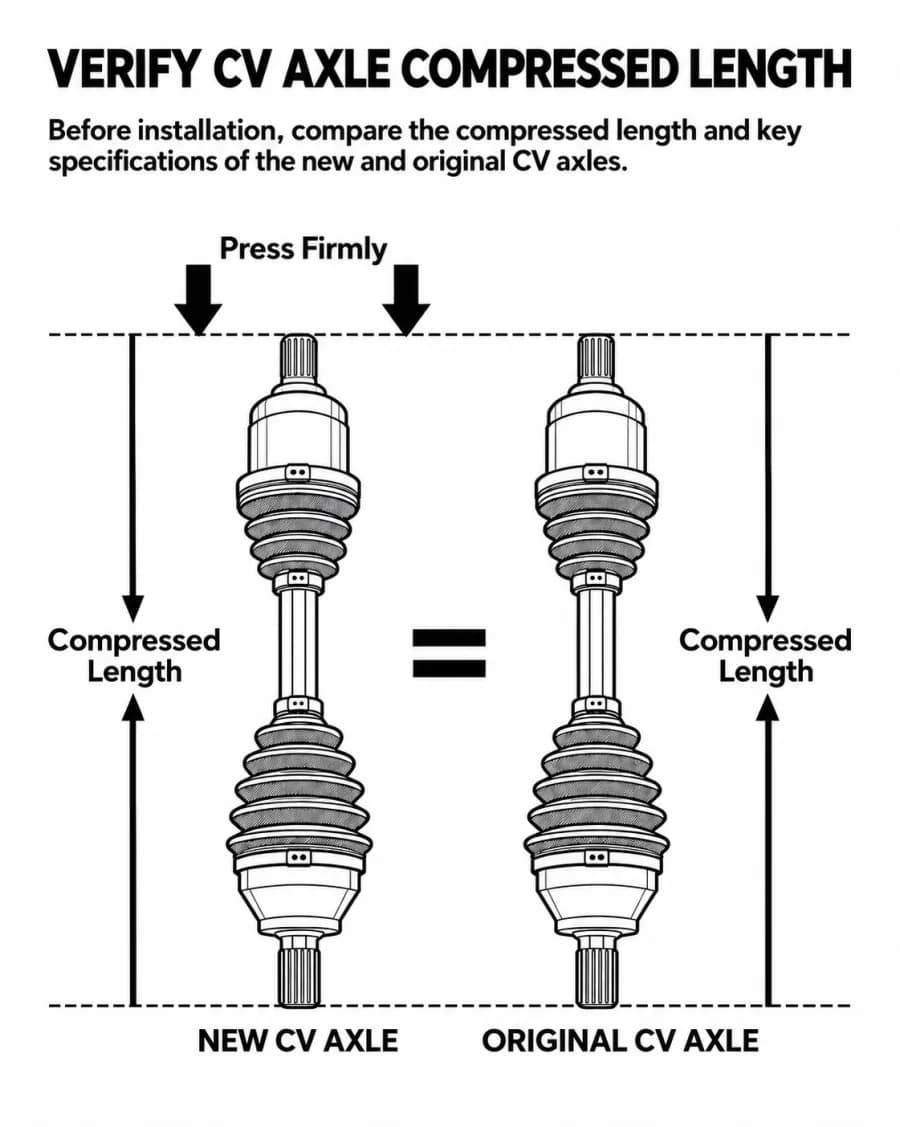
Most CV axles are side-specific due to different lengths. Please check the "Placement on Vehicle" section in our specifications table to ensure you are ordering the correct side for your repair.
The number of teeth (splines) on the ends must match exactly. Please refer to the "Technical Specifications" on this page to verify the Inner and Outer Spline counts before purchasing.
Loading vehicle options...
Choose Year, Make, and Model to check exact fitment.Front
Built to Last
Check if this fits your vehicle
Select a vehicle to check this product.
4 reviews
5 star: 2
4 star: 1
3 star: 1
Check if this fits your vehicle
| Year | Make | Model | Trim | Engine | Notes |
|---|---|---|---|---|---|
| 2014 - 2016 | Honda | TRX420FA1 FourTrax Rancher 4x4 Auto DCT | Base | - | Standard Duty Replacement |
| 2014 - 2016 | Honda | TRX420FA2 FourTrax Rancher 4x4 Auto DCT with EPS | Base | - | Standard Duty Replacement |
| 2014 - 2016 | Honda | TRX420FE1 FourTrax Rancher 4x4 ES | Base | - | Standard Duty Replacement |
| 2014 - 2016 | Honda | TRX420FM1 FourTrax Rancher 4x4 | Base | - | Standard Duty Replacement |
| 2014 - 2016 | Honda | TRX420FM2 FourTrax Rancher 4x4 with EPS | Base | - | Standard Duty Replacement |
User manual (PDF)4.3/5
Based on 4 reviews
Kelly_SUV_Life_138
Mar 23,2026
Got this axle in just a couple of days, which was awesome. Installation was straightforward and it fit perfectly. Couldn't ask for more.
RickFixIt_553
Dec 10,2025
Really impressed with the build quality on this. It feels super heavy-duty and for the price, it's a steal. Definitely a great value.
Fitment depends on the engine, transmission, and whether your car has ABS. Please enter your vehicle's Brand, Year, and Model into the "Fitment Checker" at the top of the page to confirm a match.
Most CV axles are side-specific due to different lengths. Please check the "Placement on Vehicle" section in our specifications table to ensure you are ordering the correct side for your repair.
The number of teeth (splines) on the ends must match exactly. Please refer to the "Technical Specifications" on this page to verify the Inner and Outer Spline counts before purchasing.
