


Battery experimenter

10/02/2026
 Verified buyer
I got this for a side-by-side 4 wheeler.Fit and works good.

 Front
Built to Last
Check if this fits your vehicle
Select a vehicle to check this product.
Check if this fits your vehicle
| Year | 2017 - 2020 | 2017 | 2018 | 2018 - 2020 | 2017 | 2017 | 2018 - 2020 | 2018 - 2019 | 2018 |
|---|---|---|---|---|---|---|---|---|---|
| Make | Polaris | Polaris | Polaris | Polaris | Polaris | Polaris | Polaris | Polaris | Polaris |
| Model | Ranger 500 | Ranger 570 | Ranger 570 | Ranger 570 EPS | Ranger 570-4 Crew | Ranger 570-6 Crew | Ranger Crew 570-4 | Ranger Crew 570-4 EPS | Ranger Crew 570-6 |
| Trim | Base | Base | Base | Base | Base | Base | Base | Base | Base |
| Engine | - | - | - | - | - | - | - | - | - |
| Note | Standard Duty Replacement | Standard Duty Replacement;w/ ETX model | Standard Duty Replacement | Standard Duty Replacement | Standard Duty Replacement | EFI;Standard Duty Replacement | Standard Duty Replacement | Standard Duty Replacement | Standard Duty Replacement |
 User manual (PDF)
5.0/5
Based on 5 reviews
Battery experimenter
10/02/2026
Verified buyer
I got this for a side-by-side 4 wheeler.Fit and works good.
Mil
09/28/2026
Verified buyer
It has great quality, the size is good, and it is easy to use and install. It can handle heavy loads without creating excessive noise. It looks great, works perfectly, and fits my car model very well. Overall, I really like it and am very satisfied with the quality.
Fitment depends on the engine, transmission, and whether your car has ABS. Please enter your vehicle's Brand, Year, and Model into the "Fitment Checker" at the top of the page to confirm a match.
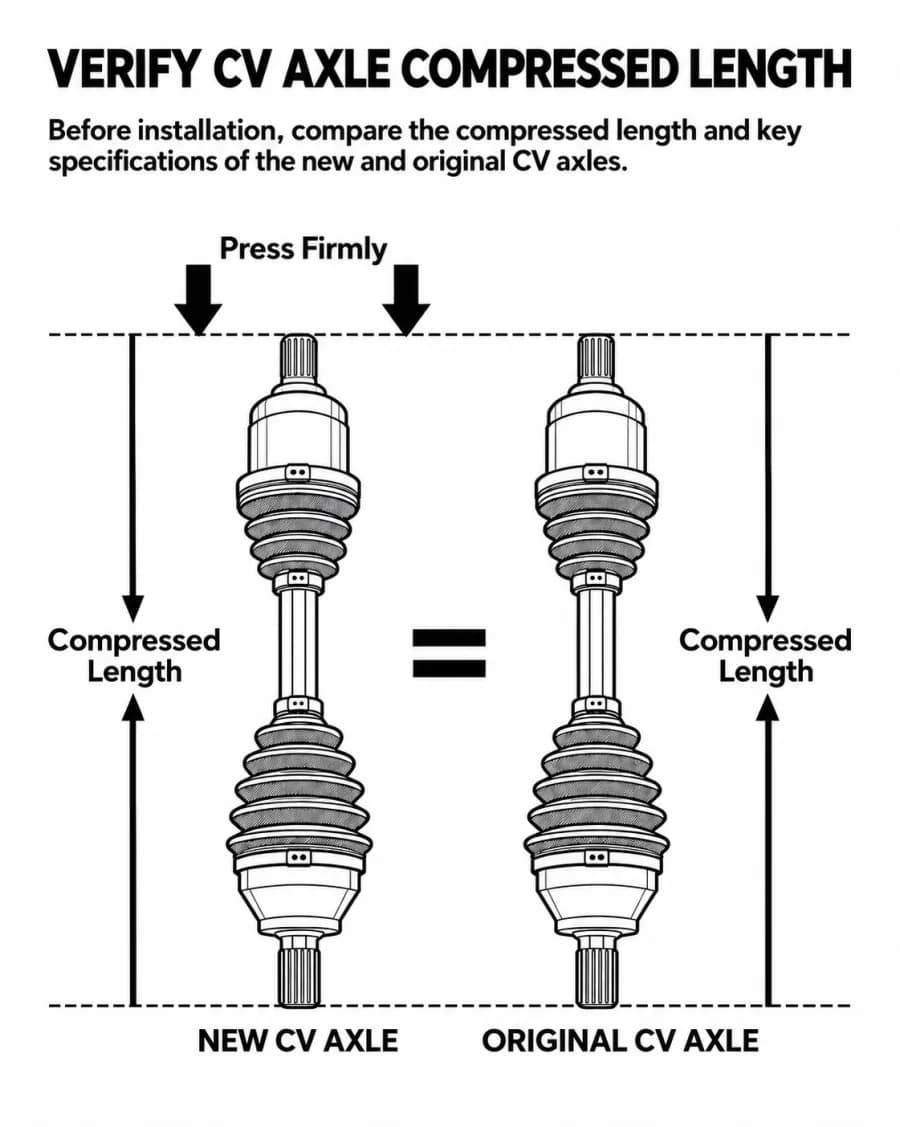
Most CV axles are side-specific due to different lengths. Please check the "Placement on Vehicle" section in our specifications table to ensure you are ordering the correct side for your repair.
The number of teeth (splines) on the ends must match exactly. Please refer to the "Technical Specifications" on this page to verify the Inner and Outer Spline counts before purchasing.
Loading vehicle options...
Choose Year, Make, and Model to check exact fitment.Front
Built to Last
Check if this fits your vehicle
Select a vehicle to check this product.
5 reviews
5 star: 5
Check if this fits your vehicle
| Year | Make | Model | Trim | Engine | Notes |
|---|---|---|---|---|---|
| 2017 - 2020 | Polaris | Ranger 500 | Base | - | Standard Duty Replacement |
| 2017 | Polaris | Ranger 570 | Base | - | Standard Duty Replacement;w/ ETX model |
| 2018 | Polaris | Ranger 570 | Base | - | Standard Duty Replacement |
| 2018 - 2020 | Polaris | Ranger 570 EPS | Base | - | Standard Duty Replacement |
| 2017 | Polaris | Ranger 570-4 Crew | Base | - | Standard Duty Replacement |
| 2017 | Polaris | Ranger 570-6 Crew | Base | - | EFI;Standard Duty Replacement |
| 2018 - 2020 | Polaris | Ranger Crew 570-4 | Base | - | Standard Duty Replacement |
| 2018 - 2019 | Polaris | Ranger Crew 570-4 EPS | Base | - | Standard Duty Replacement |
| 2018 | Polaris | Ranger Crew 570-6 | Base | - | Standard Duty Replacement |
User manual (PDF)5.0/5
Based on 5 reviews
Battery experimenter
Oct 02,2026
Verified buyer
I got this for a side-by-side 4 wheeler.Fit and works good.
Mil
Sep 28,2026
Verified buyer
It has great quality, the size is good, and it is easy to use and install. It can handle heavy loads without creating excessive noise. It looks great, works perfectly, and fits my car model very well. Overall, I really like it and am very satisfied with the quality.
Fitment depends on the engine, transmission, and whether your car has ABS. Please enter your vehicle's Brand, Year, and Model into the "Fitment Checker" at the top of the page to confirm a match.
Most CV axles are side-specific due to different lengths. Please check the "Placement on Vehicle" section in our specifications table to ensure you are ordering the correct side for your repair.
The number of teeth (splines) on the ends must match exactly. Please refer to the "Technical Specifications" on this page to verify the Inner and Outer Spline counts before purchasing.