


Jennifer_Auto_230

03/11/2026
Came in fast and was easy to install. Bolted right up with no issues. Glad I went with this brand, it's working great so far.

 Rear Left or Right
Built to Last
Check if this fits your vehicle
Select a vehicle to check this product.
Check if this fits your vehicle
| Year | 2000 - 2002 | 2000 | 2001 - 2002 | 1999 - 2000 | 2001 - 2002 | 2001 | 1999 - 2000 | 1999 |
|---|---|---|---|---|---|---|---|---|
| Make | Polaris | Polaris | Polaris | Polaris | Polaris | Polaris | Polaris | Polaris |
| Model | Diesel (455cc) | Sportsman 335 | Sportsman 400 | Sportsman 500 4x4 | Sportsman 500 HO | Sportsman 500 HO RSE | Sportsman 500 RSE | Worker 500 |
| Trim | Base | Base | Base | Base | Base | Base | Base | Base |
| Engine | - | - | - | - | - | - | - | - |
| Note | 4X4;Standard Duty Replacement | 4X4 CV Joint Rear;Standard Duty Replacement | Standard Duty Replacement | Standard Duty Replacement | Standard Duty Replacement | Standard Duty Replacement | Standard Duty Replacement | 4X4;Standard Duty Replacement |
 User manual (PDF)


4.2/5
Based on 5 reviews
Jennifer_Auto_230
03/11/2026
Came in fast and was easy to install. Bolted right up with no issues. Glad I went with this brand, it's working great so far.
Brad_AutoParts_198
12/04/2025
Fast shipping and it fit perfectly. Installation was a breeze, took me about an hour. My RZR is running like a champ again.
Fitment depends on the engine, transmission, and whether your car has ABS. Please enter your vehicle's Brand, Year, and Model into the "Fitment Checker" at the top of the page to confirm a match.
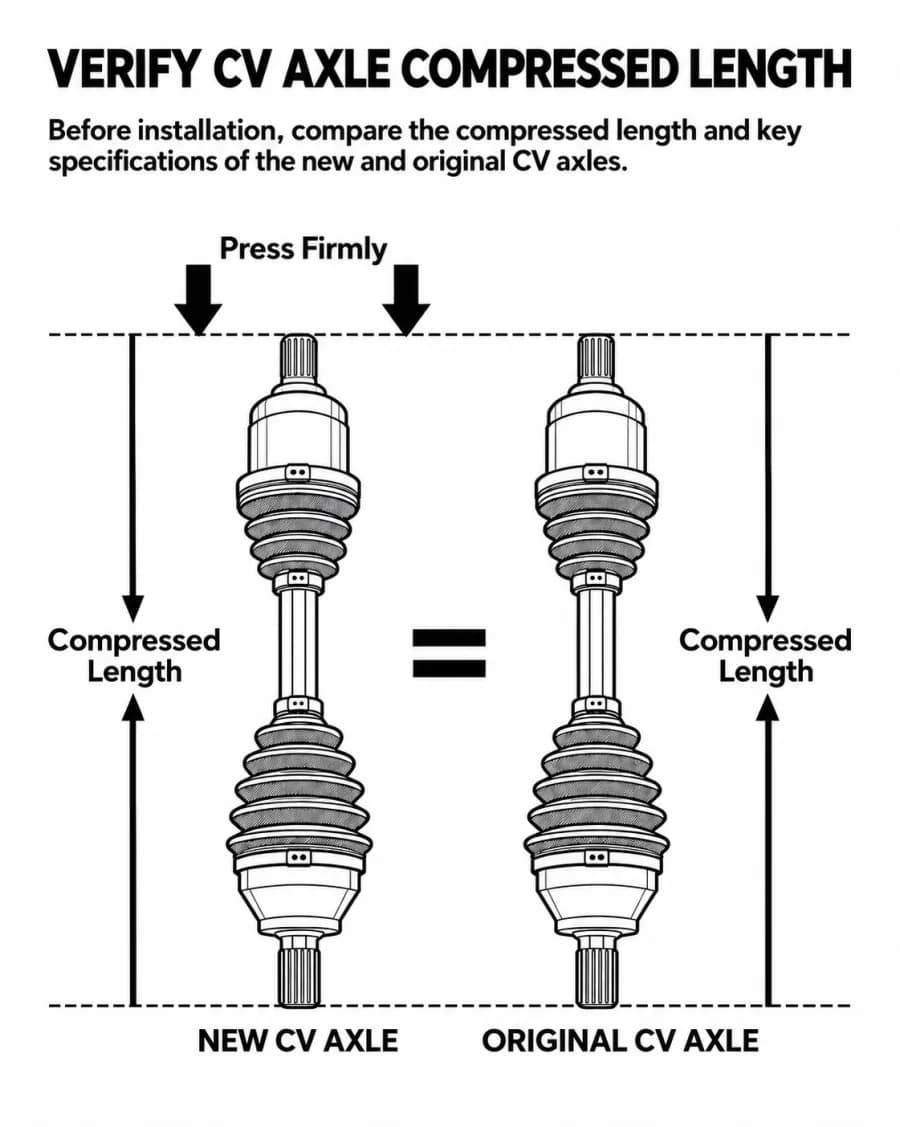
Most CV axles are side-specific due to different lengths. Please check the "Placement on Vehicle" section in our specifications table to ensure you are ordering the correct side for your repair.
The number of teeth (splines) on the ends must match exactly. Please refer to the "Technical Specifications" on this page to verify the Inner and Outer Spline counts before purchasing.
Loading vehicle options...
Choose Year, Make, and Model to check exact fitment.Rear Left or Right
Built to Last
Check if this fits your vehicle
Select a vehicle to check this product.
5 reviews
5 star: 2
4 star: 2
3 star: 1
Check if this fits your vehicle
| Year | Make | Model | Trim | Engine | Notes |
|---|---|---|---|---|---|
| 2000 - 2002 | Polaris | Diesel (455cc) | Base | - | 4X4;Standard Duty Replacement |
| 2000 | Polaris | Sportsman 335 | Base | - | 4X4 CV Joint Rear;Standard Duty Replacement |
| 2001 - 2002 | Polaris | Sportsman 400 | Base | - | Standard Duty Replacement |
| 1999 - 2000 | Polaris | Sportsman 500 4x4 | Base | - | Standard Duty Replacement |
| 2001 - 2002 | Polaris | Sportsman 500 HO | Base | - | Standard Duty Replacement |
| 2001 | Polaris | Sportsman 500 HO RSE | Base | - | Standard Duty Replacement |
| 1999 - 2000 | Polaris | Sportsman 500 RSE | Base | - | Standard Duty Replacement |
| 1999 | Polaris | Worker 500 | Base | - | 4X4;Standard Duty Replacement |
User manual (PDF)4.2/5
Based on 5 reviews
Jennifer_Auto_230
Mar 11,2026
Came in fast and was easy to install. Bolted right up with no issues. Glad I went with this brand, it's working great so far.
Brad_AutoParts_198
Dec 04,2025
Fast shipping and it fit perfectly. Installation was a breeze, took me about an hour. My RZR is running like a champ again.
Fitment depends on the engine, transmission, and whether your car has ABS. Please enter your vehicle's Brand, Year, and Model into the "Fitment Checker" at the top of the page to confirm a match.
Most CV axles are side-specific due to different lengths. Please check the "Placement on Vehicle" section in our specifications table to ensure you are ordering the correct side for your repair.
The number of teeth (splines) on the ends must match exactly. Please refer to the "Technical Specifications" on this page to verify the Inner and Outer Spline counts before purchasing.
