


Brad_AutoParts_894

03/26/2026
The grinding noise from my old axle is completely gone. These new ones fit perfectly and my machine runs smooth as ever. Totally worth the upgrade.

 Rear
Built to Last
Check if this fits your vehicle
Select a vehicle to check this product.
Check if this fits your vehicle
| Year | 2010 | 2010 - 2014 | 2011 - 2012 | 2012 - 2013 | 2013 - 2014 | 2010 | 2011 - 2012 | 2010 - 2012 | 2010 - 2012 | 2012 | 2012 |
|---|---|---|---|---|---|---|---|---|---|---|---|
| Make | Polaris | Polaris | Polaris | Polaris | Polaris | Polaris | Polaris | Polaris | Polaris | Polaris | Polaris |
| Model | Ranger 4x4 500 EFI | Ranger 800 Crew | Ranger 800 Crew EPS | Ranger 800 Crew EPS LE | Ranger 800 EFI | Ranger 800 HD | Ranger 800 HD EPS | Ranger 800 XP | Ranger 800 XP EPS | Ranger 800 XP EPS LE | Ranger 800 XP LE |
| Trim | Base | Base | Base | Base | Base | Base | Base | Base | Base | Base | Base |
| Engine | - | - | - | - | - | - | - | - | - | - | - |
| Note | Standard Duty Replacement | Standard Duty Replacement | Standard Duty Replacement | Standard Duty Replacement | Standard Duty Replacement | Standard Duty Replacement | Standard Duty Replacement | Standard Duty Replacement | Standard Duty Replacement | Standard Duty Replacement | Standard Duty Replacement |
 User manual (PDF)


4.7/5
Based on 3 reviews
Brad_AutoParts_894
03/26/2026
The grinding noise from my old axle is completely gone. These new ones fit perfectly and my machine runs smooth as ever. Totally worth the upgrade.
Brad_AutoParts_13
02/06/2026
The build quality on these is impressive. They feel really robust and heavy-duty. Considering how much cheaper they are than the OEM parts, the value is outstanding.
Fitment depends on the engine, transmission, and whether your car has ABS. Please enter your vehicle's Brand, Year, and Model into the "Fitment Checker" at the top of the page to confirm a match.
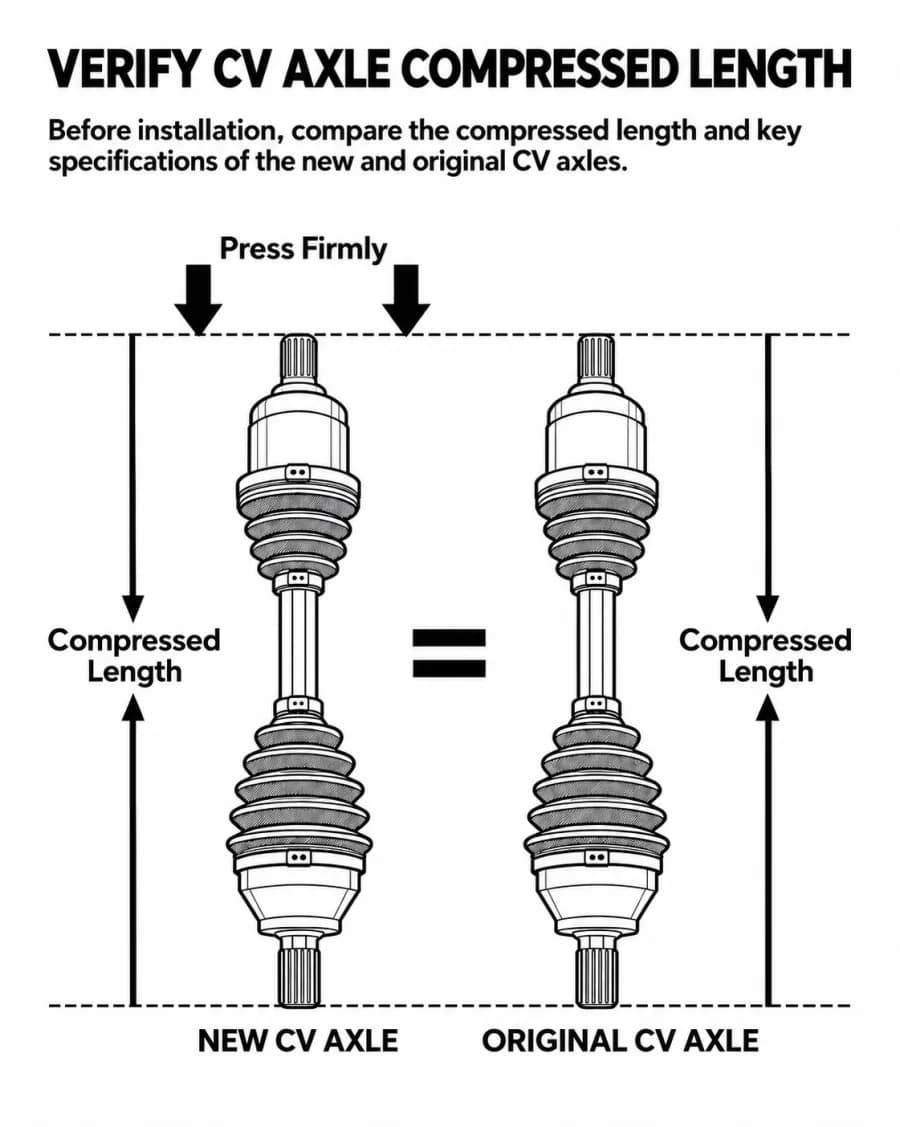
Most CV axles are side-specific due to different lengths. Please check the "Placement on Vehicle" section in our specifications table to ensure you are ordering the correct side for your repair.
The number of teeth (splines) on the ends must match exactly. Please refer to the "Technical Specifications" on this page to verify the Inner and Outer Spline counts before purchasing.
Loading vehicle options...
Choose Year, Make, and Model to check exact fitment.Rear
Built to Last
Check if this fits your vehicle
Select a vehicle to check this product.
3 reviews
5 star: 2
4 star: 1
Check if this fits your vehicle
| Year | Make | Model | Trim | Engine | Notes |
|---|---|---|---|---|---|
| 2010 | Polaris | Ranger 4x4 500 EFI | Base | - | Standard Duty Replacement |
| 2010 - 2014 | Polaris | Ranger 800 Crew | Base | - | Standard Duty Replacement |
| 2011 - 2012 | Polaris | Ranger 800 Crew EPS | Base | - | Standard Duty Replacement |
| 2012 - 2013 | Polaris | Ranger 800 Crew EPS LE | Base | - | Standard Duty Replacement |
| 2013 - 2014 | Polaris | Ranger 800 EFI | Base | - | Standard Duty Replacement |
| 2010 | Polaris | Ranger 800 HD | Base | - | Standard Duty Replacement |
| 2011 - 2012 | Polaris | Ranger 800 HD EPS | Base | - | Standard Duty Replacement |
| 2010 - 2012 | Polaris | Ranger 800 XP | Base | - | Standard Duty Replacement |
| 2010 - 2012 | Polaris | Ranger 800 XP EPS | Base | - | Standard Duty Replacement |
| 2012 | Polaris | Ranger 800 XP EPS LE | Base | - | Standard Duty Replacement |
| 2012 | Polaris | Ranger 800 XP LE | Base | - | Standard Duty Replacement |
User manual (PDF)4.7/5
Based on 3 reviews
Brad_AutoParts_894
Mar 26,2026
The grinding noise from my old axle is completely gone. These new ones fit perfectly and my machine runs smooth as ever. Totally worth the upgrade.
Brad_AutoParts_13
Feb 06,2026
The build quality on these is impressive. They feel really robust and heavy-duty. Considering how much cheaper they are than the OEM parts, the value is outstanding.
Fitment depends on the engine, transmission, and whether your car has ABS. Please enter your vehicle's Brand, Year, and Model into the "Fitment Checker" at the top of the page to confirm a match.
Most CV axles are side-specific due to different lengths. Please check the "Placement on Vehicle" section in our specifications table to ensure you are ordering the correct side for your repair.
The number of teeth (splines) on the ends must match exactly. Please refer to the "Technical Specifications" on this page to verify the Inner and Outer Spline counts before purchasing.
