


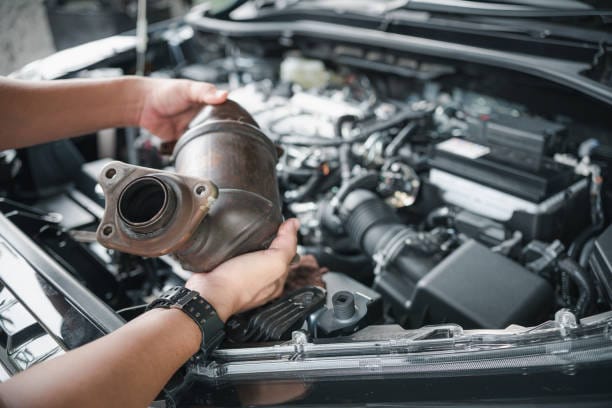
A catalytic converter plays a vital role in your vehicle's exhaust system by reducing harmful emissions. When it fails, you may experience poor engine performance, increased fuel consumption, or even legal issues during emissions testing. Replacing it yourself can be cost-effective if you have the right tools and mechanical skills.
If you’re wondering how to replace a catalytic converter—this guide breaks it all down step-by-step.
Understanding the Catalytic Converter Basics
How Does Catalytic Converter Work
A catalytic converter uses precious metals such as platinum and palladium to trigger chemical reactions that clean your exhaust. These metals help break down harmful gases like nitrogen oxides, hydrocarbons, and carbon monoxide, turning them into less harmful substances like water vapor and carbon dioxide. This process plays a key role in reducing vehicle emissions.
Signs of a Bad Catalytic Converter
If your catalytic converter is starting to fail, you may notice a few warning signs. A strong, sulfur-like smell (similar to rotten eggs), poor acceleration—especially at speeds over 40 mph—or a rattling sound from your exhaust are all red flags. A check engine light on your dashboard may also point to a problem with the converter.
Don't ignore these signs. Driving with a damaged converter can hurt your engine, reduce fuel efficiency, and even result in legal trouble due to emissions violations.
Pro Tips for Exhaust System Work
Inspect the Entire System First
Before starting any repairs or replacements, examine the full length of the exhaust system. Look for rust, cracks, holes, or broken hangers. Pay special attention to joints and welded areas. If you find heavy rust, try squeezing the pipe—if it feels soft or gives under pressure, it’s too far gone and should be replaced.
Expect Rusted Fasteners
Exhaust components are exposed to water, road salt, and extreme heat cycles, which makes rust a common issue. Bolts and nuts may be so corroded that standard tools won’t work. Use penetrating oil liberally, but be ready to cut stubborn bolts with a torch or break them off if necessary. In severe cases, a chisel and hammer may be required to free rusted flanges.
Measure Pipe Diameters
Before purchasing a new catalytic converter, measure the diameter of the exhaust pipes before and after the existing unit. This ensures you get the correct size. Older vehicles may already have had the converter replaced with a different-sized part, so don’t rely solely on the original specs.
Tools For Catalytic Converter Replacement
Replacing a catalytic converter isn’t overly complex, but it does require moderate mechanical skills and the right tools. The job usually takes 2 to 3 hours to finish.
Essential tools include a jack with sturdy jack stands, a ratchet and socket set, wrenches, and a special socket for the oxygen sensor. You’ll also need penetrating oil to help loosen rusted or tight bolts.
Choosing the correct replacement part is vital—be sure it meets either CARB or EPA emissions standards based on your state’s regulations.
Safety should always come first. Never work under a car supported by just a jack—use jack stands for stability. Wearing safety glasses and gloves will also help protect you from sharp parts and falling debris.
How to Change Catalytic Converter (Step-by-Step)
Replacing a catalytic converter involves several detailed steps. Follow this guide carefully to ensure a safe and successful installation.
Step 1: Prepare the Vehicle
Park your vehicle on a level surface. Use a floor jack to lift the car, then secure it firmly with jack stands. Never work under a vehicle supported only by a jack.
Step 2: Remove Cold Air Intake and Engine Cover
To reach the exhaust manifold, begin by removing the cold air intake and engine cover. Once the engine cover is off, replace the oil cap right away to keep debris out of the engine.
Step 3: Detach the Engine Cover Bracket
Next, remove the bracket holding the engine cover in place. This step allows clear access to the exhaust manifold.
Step 4: Unplug the Oxygen Sensor
Carefully disconnect the oxygen sensor from the catalytic converter. Take note of its wiring and location for accurate reinstallation later.
Step 5: Take Off the Heat Shield
Remove the heat shield to expose the catalytic converter and give yourself more room to work.
Step 6: Check the Exhaust Manifold
Before continuing, inspect the exhaust manifold for cracks or signs of wear. Replace if damaged.
Step 7: Remove the Old Catalytic Converter
Unbolt the catalytic converter from the exhaust system. Use penetrating oil to loosen rusted bolts. A hammer and breaker bar may be needed for extra leverage.
Step 8: Install the New Catalytic Converter
Position the new converter correctly, checking that the flow direction is accurate. Use fresh gaskets and hangers, and apply anti-seize compound to the bolts and studs.
Step 9: Reattach the Oxygen Sensor
Install the oxygen sensor in its original location. A proper connection is essential for the engine’s computer to monitor emissions effectively.
Step 10: Reassemble and Check for Leaks
Reinstall the heat shield, engine cover bracket, engine cover, and cold air intake. Start the engine and check all joints for any signs of exhaust leaks.
Step 11: Final Check
Inspect all components to confirm everything is secure. Ensure the check engine light is off and listen for any abnormal exhaust noises.
Note: This guide offers a general overview. If you're unsure at any point, consult a certified mechanic for help.
FAQs About Replacing Catalytic Converter
Q: Can I replace the catalytic converter myself?
A: Yes, if you have basic mechanical skills and the right tools, it’s possible to replace a catalytic converter on your own. However, you’ll need to safely lift the car, disconnect the exhaust components, and make sure everything is properly sealed and aligned. If welding is required, professional help is advised.
Q: Is it worth replacing a catalytic converter?
A: Yes. A working catalytic converter is essential for your car to pass emissions tests and run efficiently. A faulty one can cause poor fuel economy, engine trouble, and even prevent your car from starting. Replacing it keeps your vehicle legal and reduces harmful emissions.
Q:What should I check before replacing the catalytic converter?
A: Before replacing the converter, run a full diagnostic. Many converter issues are caused by other problems—like a misfiring engine, oil leaks, or a faulty oxygen sensor. If these aren’t fixed first, the new converter will likely fail too. Always identify and repair the root cause before installation.
Q:Should I clean or replace the catalytic converter?
A: Cleaning might help if the converter is only slightly clogged. But if it’s severely blocked, melted, or damaged, cleaning won’t fix it. In most cases, replacement is the more reliable and long-term solution.
Q:Can my car run without a catalytic converter?
A: Technically, yes—but it’s not recommended. Driving without a catalytic converter is illegal in many areas, will likely cause your check engine light to stay on, and contributes to air pollution. It can also affect your car’s performance and fuel efficiency.
Final Considerations
Replacing a catalytic converter is a major repair that can directly affect your car’s performance and emissions. With the right tools and a good understanding of the process, it’s possible to handle the replacement yourself. Just make sure to fix any related issues—such as faulty sensors or leaks—before installing a new converter, so it lasts as long as it should.
Whether you take the DIY route or have a mechanic do the job, it’s essential to choose a reliable replacement part. PHILTOP offers durable, emissions-compliant catalytic converters designed for long-term performance and efficiency. Keeping your emissions system in good condition isn’t just good for your engine—it’s better for the environment too.