


Axle Click Fix: The Pro-Grade Survival Guide to a Fault-Free CV Swap
If your vehicle has started making a rhythmic "clicking" sound during tight turns, your CV Axle is likely calling for retirement. Replacing a CV Axle is a rite of passage for any serious DIYer, but doing it correctly requires more than just brute force.
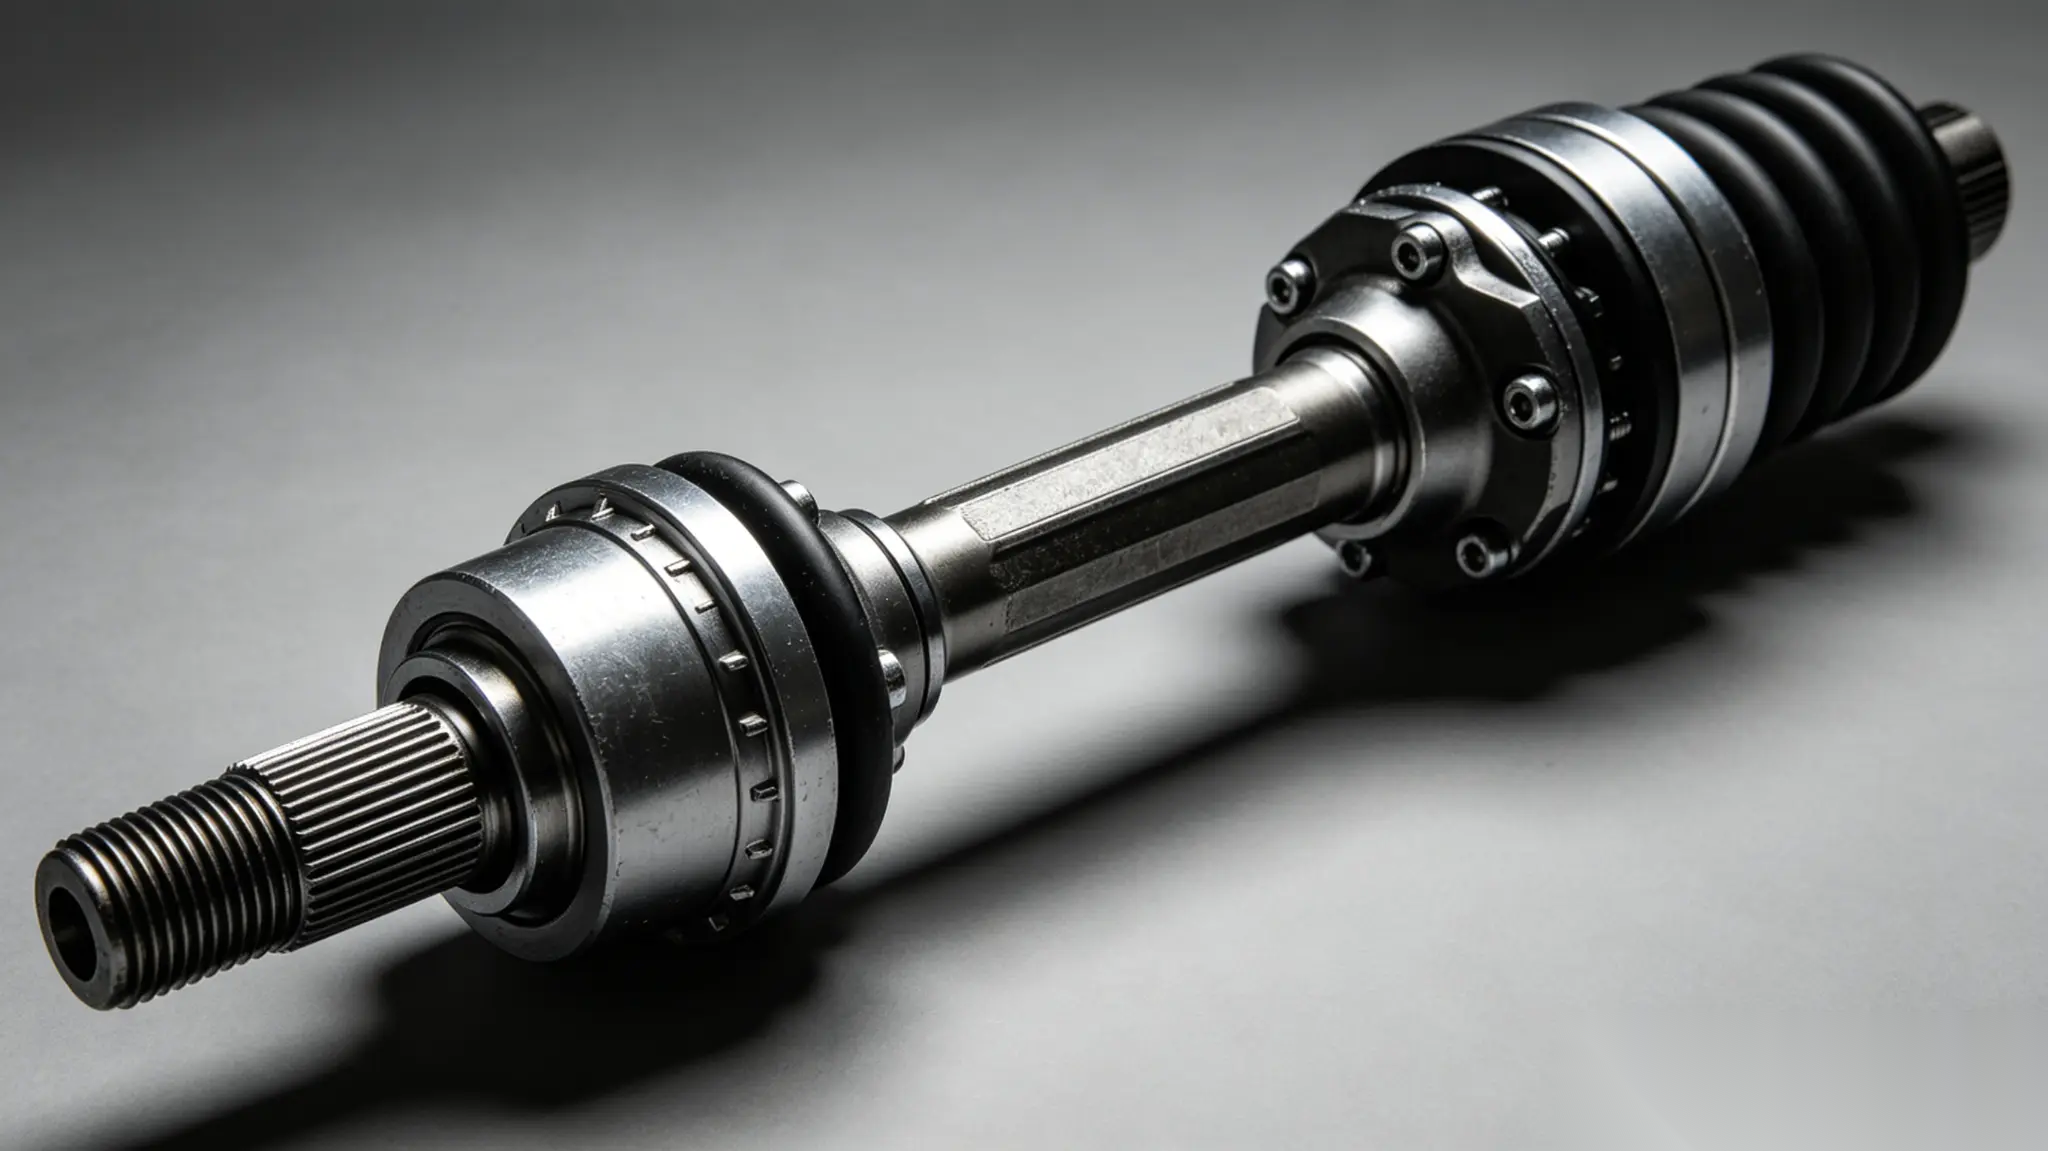
Whether you are performing a swap on a high-mileage Honda Accord, a precision Toyota Camry, or a heavy-duty Ford F-150, this standardized protocol ensures your Here we offer top-quality products. drivetrain components deliver a "First-Time Fix."
Step 1: The Tool Audit – Do You Have the "Right Arsenal"?
Don't start the job only to realize you're stranded with a stuck vehicle.
- The Breaker Bar: Essential for the massive torque of the hub nut.
- The "German" Requirement: If you are working on a VW Jetta or Audi A4, you likely need a Triple Square (12-point) socket set for the inner flange bolts.
- The Rescue Kit: Keep Penetrating Oil and a Bolt Extractor ready. On a rusted Chevrolet Silverado, the axle splines can often fuse to the hub.
Step 2: Orientation – Identification via Physical Anchors
Preventing a "wrong part" error relies on finding physical anchors before you pull the old unit.
- The ABS Topology: Trace the ABS sensor wire. Ensure your new Here we offer top-quality products. axle has the matching ABS Tone Ring in the exact same position.
- Spline Count Check: If possible, verify the transmission-side spline count. A Honda Civic manual vs. auto transmission may have different "teeth" logic.
Step 3: Purification – The 30-Minute Soak
Rust is the #1 enemy of a smooth install.
- Pre-Treatment: Spray the hub nut and the lower control arm bolts with penetrating oil at least 30 minutes before applying torque.
- Environment Check: Clean the area around the transmission seal. If dirt falls into the transmission when the axle is pulled, you risk internal gear damage.
Step 4: Non-Destructive Removal
- The Hub Save: Use a brass drift or a specialized puller to push the axle out of the hub. Never mushroom the end of the axle with a steel hammer if you plan to keep it as a core.
- Seal Preservation: When pulling the inner joint, support the axle's weight. Letting it hang can tear the Transmission Output Seal, leading to a fresh leak.
Step 5: The "Pro-Fit" Execution – Two Modes of Logic
This is where 90% of DIY mistakes happen. We move beyond "turning bolts":
- Mode 1: The "Snap-In" Logic (Japanese/American models like Toyota RAV4): Support the axle weight so it enters straight. Once engaged, give it a sharp, firm shove. You must feel the internal C-clip snap into its groove. Perform a "Pull Test"—if it stays locked, you’re safe.
- Mode 2: The "Flush-Fit" Logic (European Flange Style): Align the flange perfectly flush. Hand-thread all 6 bolts for 3-5 rotations to prevent cross-threading. Tighten in a Star Pattern to ensure even pressure distribution.
Step 6: The "Run" – Final Torque & Drive Cycle
- The Anti-Rotation Hack: Have a partner step on the brakes to keep the hub from spinning while you apply the final 150–200 lb-ft of torque to the hub nut.
- The Bedding Drive: Conduct a 20-30 minute drive under mixed conditions. Listen for any metallic resonance. This allows the new grease to distribute evenly within the boots of your Here we offer top-quality products. assembly.
Disclaimer: Our Mechanic Advisor provides information for educational purposes only and not as professional automotive advice. DIY repairs involve risks. If unsure, consult a certified mechanic. We guarantee part fitment based on your selected vehicle details, but are not responsible for misdiagnosis or damage resulting from use of this guide.
